 Save
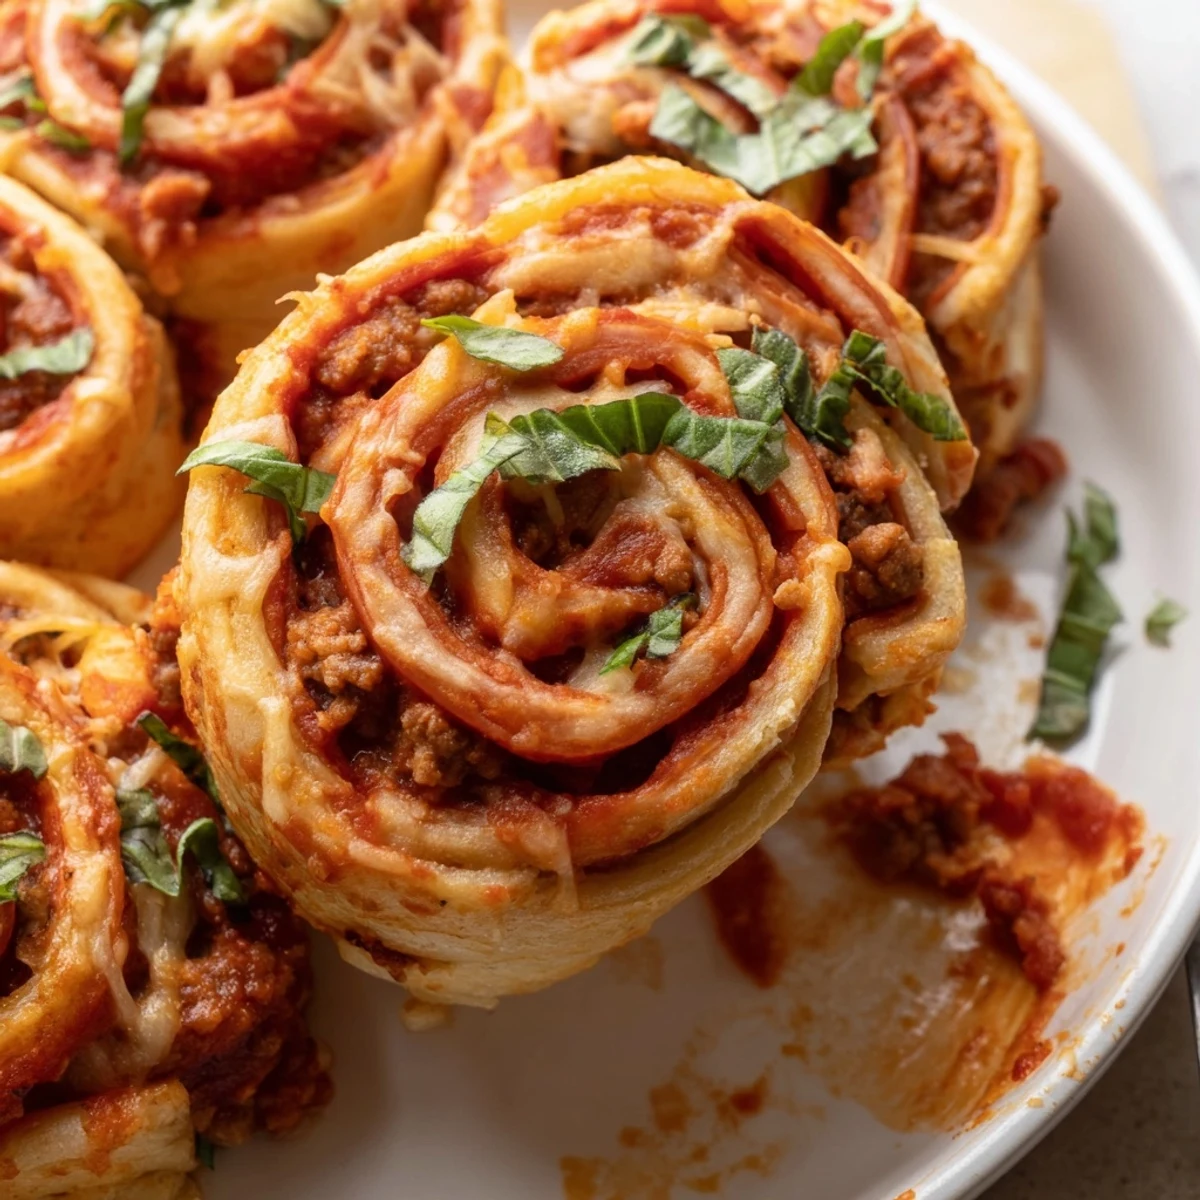
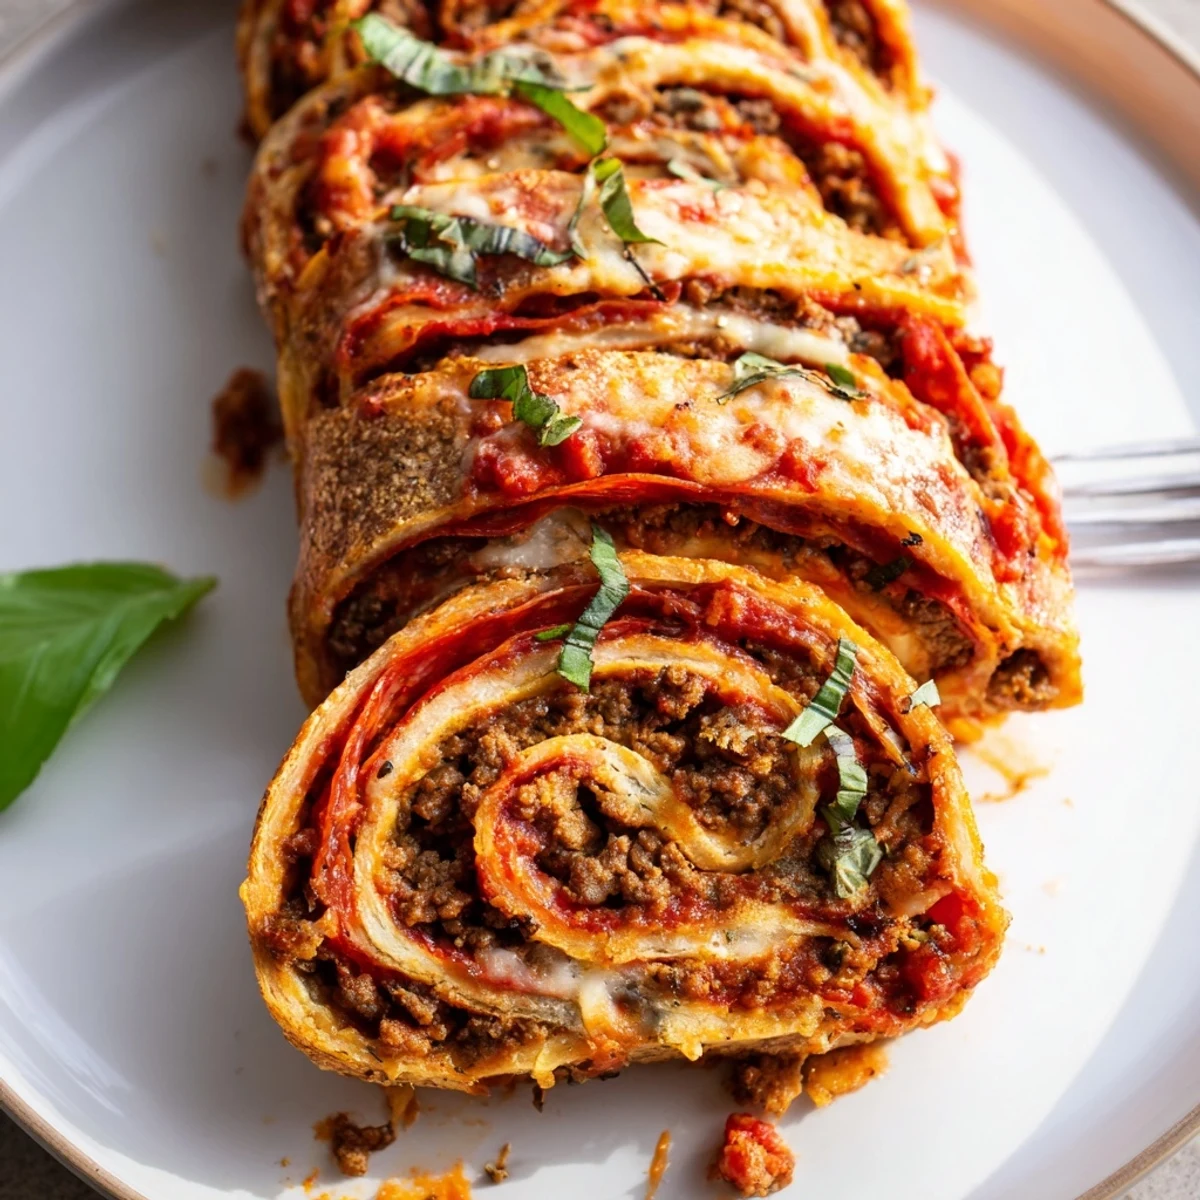
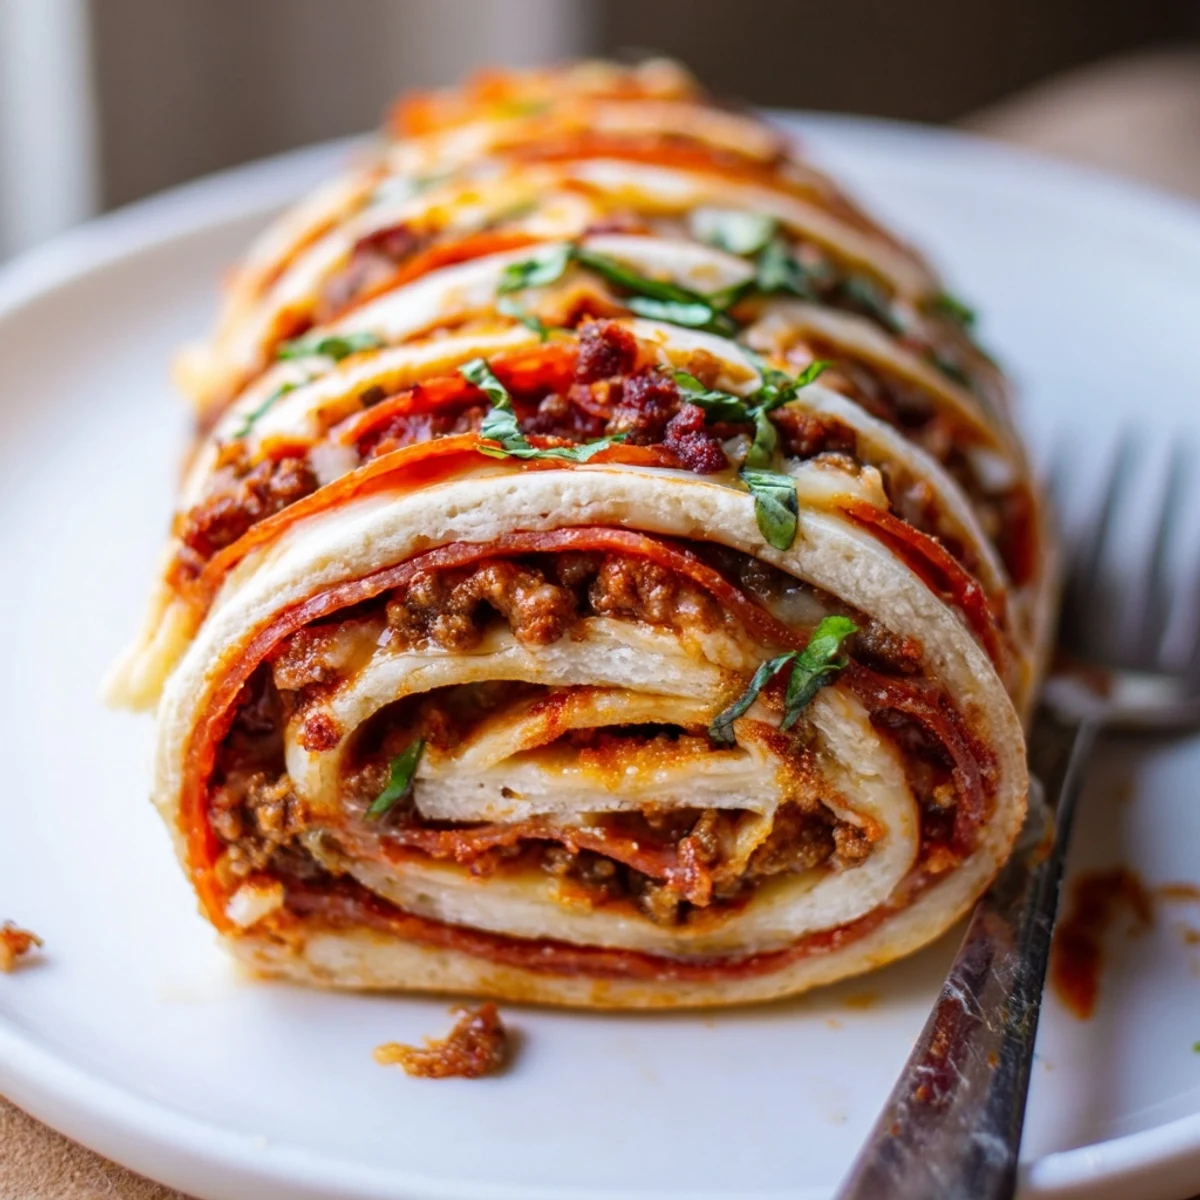
Save Crispy, golden roll-ups packed with seasoned ground beef, spicy pepperoni and gooey mozzarella are ready in about 35 minutes. Brown beef with garlic, salt, pepper and Italian herbs, drain, then spread pizza sauce over rolled-out dough and layer meats and cheeses.
Roll tightly, slice into eight pieces, brush with olive oil and bake at 200°C (400°F) until golden and bubbly. Serve warm with extra sauce; freeze cooled portions for later reheating.
The sound of sizzling beef in my kitchen always brings an energy to weeknight snacking, but making these Cheesy Beef Pepperoni Pizza Roll Ups was a game changer one lazy Saturday afternoon. The smell of warm, tangy pizza sauce rising as the rolls baked tempted my patience more than once. I certainly didn't plan for them to become a regular request from both adults and kids, yet here we are—pan always empty a few minutes after serving. Sometimes all it takes is melting cheese to mend a long day.
I remember once making these for a last-minute movie night—someone said let's pause for pizza, so I whipped these up with what was lurking in the fridge. We ended up laughing around the table with napkins everywhere and dipping sauce drips on our sleeves. The roll ups vanished before the credits even started, and no one could decide if they liked the crispy edge pieces or the middle cheese bombs better. That night, I learned these roll ups turn casual hangs into memorable feasts.
Ingredients
- Ground beef: Always brown the beef just until cooked; overcooking dries it out and you want that tender, juicy texture inside the roll ups.
- Pepperoni: I find stacking slices in the center gives some bites a spicy surprise—switch brands if you like more or less heat.
- Shredded mozzarella cheese: Don't skimp on the cheese, the pull-apart factor really is the main event.
- Grated Parmesan cheese: I sprinkle a bit into the filling and on top—its nuttiness rounds out the pizza flavor.
- Refrigerated pizza dough: Pre-cut dough sheets work well, but rolling it to an even thickness keeps every roll up baking at the same rate.
- Pizza sauce: Spread it thin to avoid a soggy base; I always save extra for dipping after baking.
- Dried Italian herbs: These herbs layer in a classic aroma that perfumes your kitchen.
- Garlic powder: This is my shortcut to depth—use it conservatively and adjust to your liking.
- Salt and pepper: Season the beef directly, rather than the whole filling, to control the flavor.
- Olive oil: Brushing the tops gives you that shiny, golden crust without deep frying.
- Chopped fresh basil or parsley (optional): A sprinkle at the end brightens and freshens up heavy flavors.
Instructions
- Preheat and prep:
- Set your oven to 200°C (400°F) and line a baking sheet with parchment paper to prevent sticking.
- Brown the beef:
- Heat a skillet over medium and add the ground beef; season with salt, pepper, garlic powder, and Italian herbs, stirring as the meat browns and releases a meaty aroma.
- Roll the dough:
- On a lightly floured countertop, roll out your pizza dough to a nice rectangle, about 30 x 25 cm, using a rolling pin if you like.
- Spread the sauce:
- Ladle pizza sauce evenly across the dough, leaving a small border so your filling stays put.
- Layer the fillings:
- Scatter the cooked beef, lay down pepperoni slices, and shower the whole thing with mozzarella and Parmesan until it's generously covered but not overstuffed.
- Roll it up:
- Start at a long side and roll the dough up tightly into a log—pinch the seam to seal, pressing gently as you go.
- Slice and arrange:
- With a sharp knife, cut the log into eight equal pieces and place them cut side up on the baking sheet so the filling peeks out.
- Brush with oil:
- Brush olive oil over each roll for color and crunch, making sure to cover the exposed edges.
- Bake until golden:
- Bake for 12–15 minutes; you'll know they're ready when the cheese is bubbling and the tops look beautifully browned.
- Finish and serve:
- Let them cool just a few minutes to avoid burned tongues, garnish with fresh basil or parsley, and serve alongside a bowl of warm pizza sauce for dipping.
 Save
Save During my cousin's birthday, these were devoured between rounds of games—one friend confessed she usually skips appetizers but was hooked once the aroma hit our living room. It made me appreciate how something so simple can spark big smiles and bigger appetites. These roll ups have somehow become our celebratory staple. I love how they've woven themselves into our happiest gatherings.
Make-Ahead and Freezing Advice
I've learned these roll ups are lifesavers when prepped ahead and stored in the fridge until party time; you can also freeze them after baking and just reheat for a fresh crunch. They handle thaws like a champ, and nobody guesses you made them the day before. I wrap cooled roll ups tightly in foil before freezing, then pop them in a hot oven to revive that bakery-fresh smell. Honestly, having a stash for emergencies feels like uncovering a hidden kitchen cheat code.
Customizing Your Pizza Roll Ups
Once you get the hang of rolling, swapping in cooked chicken, sausage, or adding chopped bell peppers becomes second nature. My neighbor likes shredded spinach in hers for a green twist, while one adventurous friend tried pineapple and swore by it. The possibilities are endless, which means this recipe never gets old. Substitutions are a fun way to make the roll ups your own.
Party-Perfect Serving & Dipping Ideas
Served cut side up on a wooden board, they look rustic and inviting—add little ramekins of marinara, ranch, or spicy aioli for dipping and you'll have people gathered around the snack table all evening. Toothpicks make for easy grabbing, and they're just as tasty when cooled to room temperature. A sprinkle of extra Parmesan over the top before baking amps up the flavor even more.
- If assembling early, keep covered with plastic wrap to avoid the dough drying out.
- Reheat leftovers in the oven, not the microwave, to restore crispness.
- Leave space between rolls on the baking tray for even browning.
 Save
Save Whether for parties, movie nights, or sneaky afterschool snacks, these pizza roll ups spark instant joy. I hope they become a playful hit in your kitchen too.
Recipe FAQs
- → Can I swap the ground beef for another protein?
-
Yes. Ground chicken or turkey work well; brown and season them the same way. Adjust cooking briefly if using pre-cooked fillings like shredded rotisserie chicken to avoid drying out.
- → How do I prevent soggy roll-up bottoms?
-
Drain excess fat from the cooked meat, brush the cut sides or tops with a thin layer of olive oil, and bake on parchment or a lightly oiled sheet in a preheated, fully hot oven to encourage crisping.
- → Can I make these ahead and freeze them?
-
You can freeze either raw, assembled roll-ups (flash-freeze on the tray, then bag) or fully baked ones. Reheat from frozen in a hot oven until heated through and crisp, about 12–18 minutes at 180–200°C (350–400°F).
- → What cheeses work besides mozzarella and Parmesan?
-
Provolone, fontina or a mild cheddar blend well for melt and flavor. For extra tang, mix a little grated Asiago or pecorino with the Parmesan.
- → How can I add vegetables without making them watery?
-
Sauté bell peppers, onions or mushrooms first to cook off moisture, then cool and pat dry before layering. Thinly sliced vegetables also release less liquid than large diced pieces.
- → How do I increase the heat or spice level?
-
Use spicy pepperoni, add chili flakes to the beef while cooking, or sprinkle torn pepperoncini or diced jalapeño into the filling. A pinch of cayenne or a drizzle of hot sauce in the meat adds controlled heat.