 Save
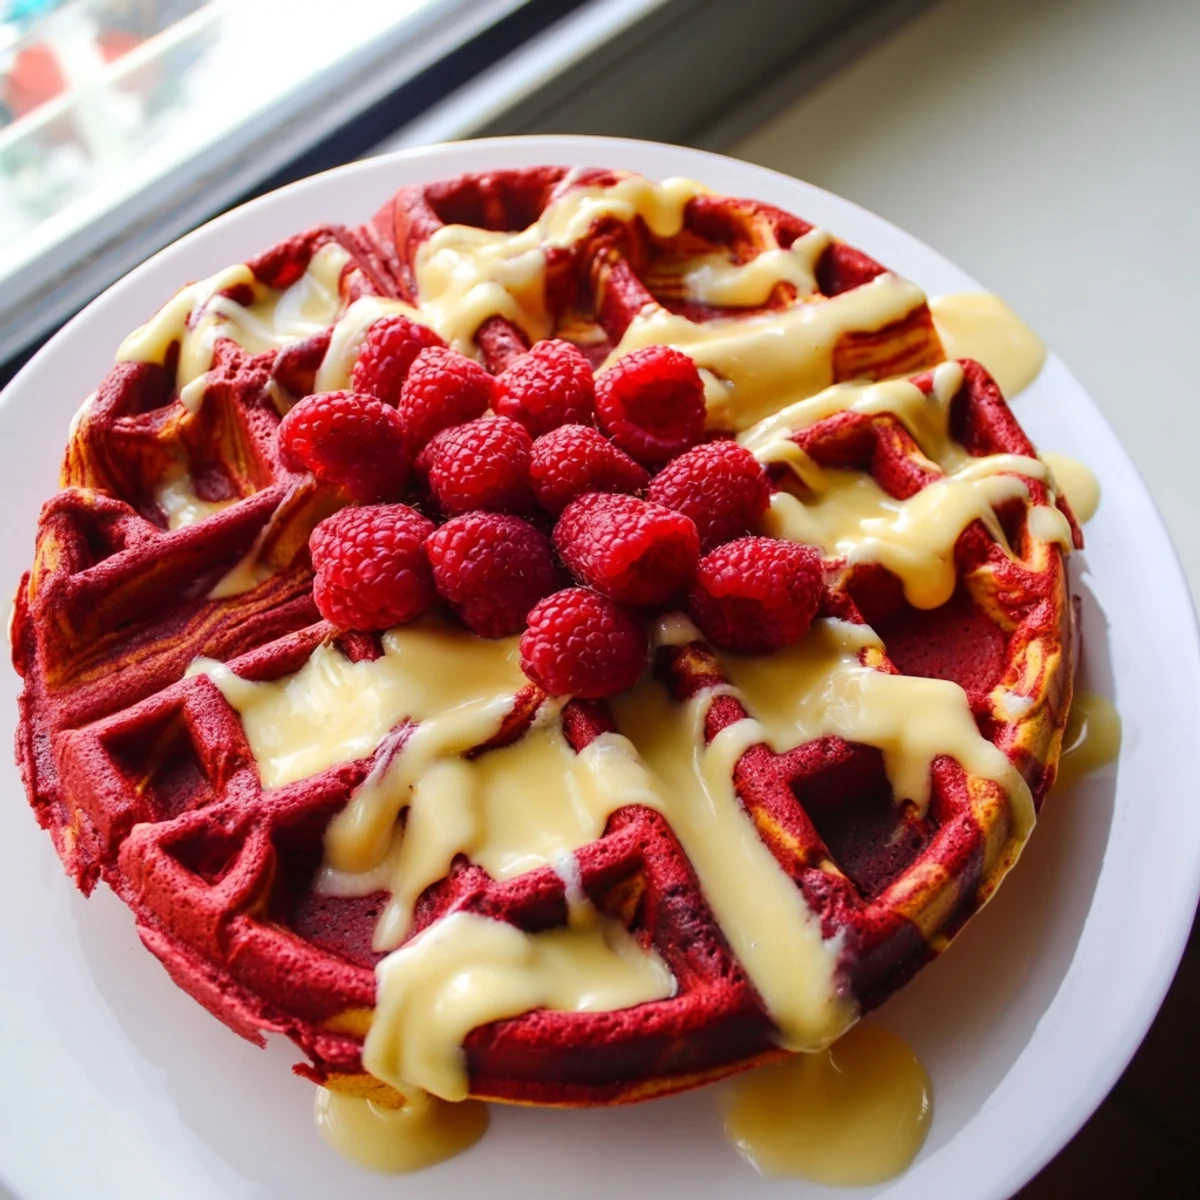
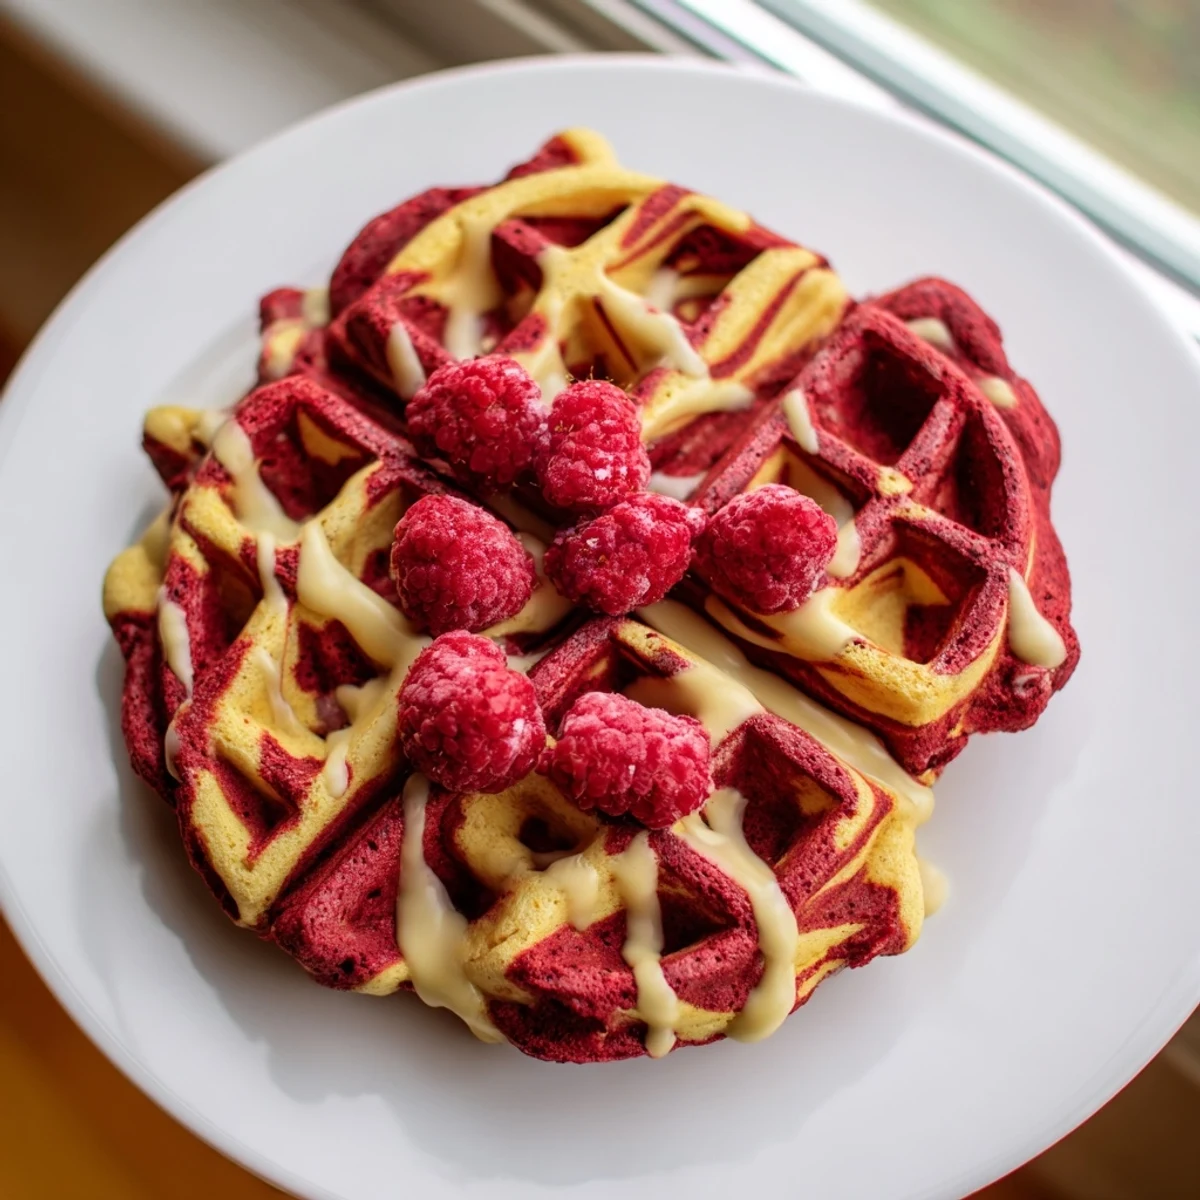
Save Elevate your breakfast game with these stunning red velvet marble waffles that combine the classic flavors of red velvet cake with the comforting texture of homemade waffles. The beautiful marbled pattern creates an eye-catching presentation that's perfect for weekend brunches, Valentine's Day, or any special morning occasion.
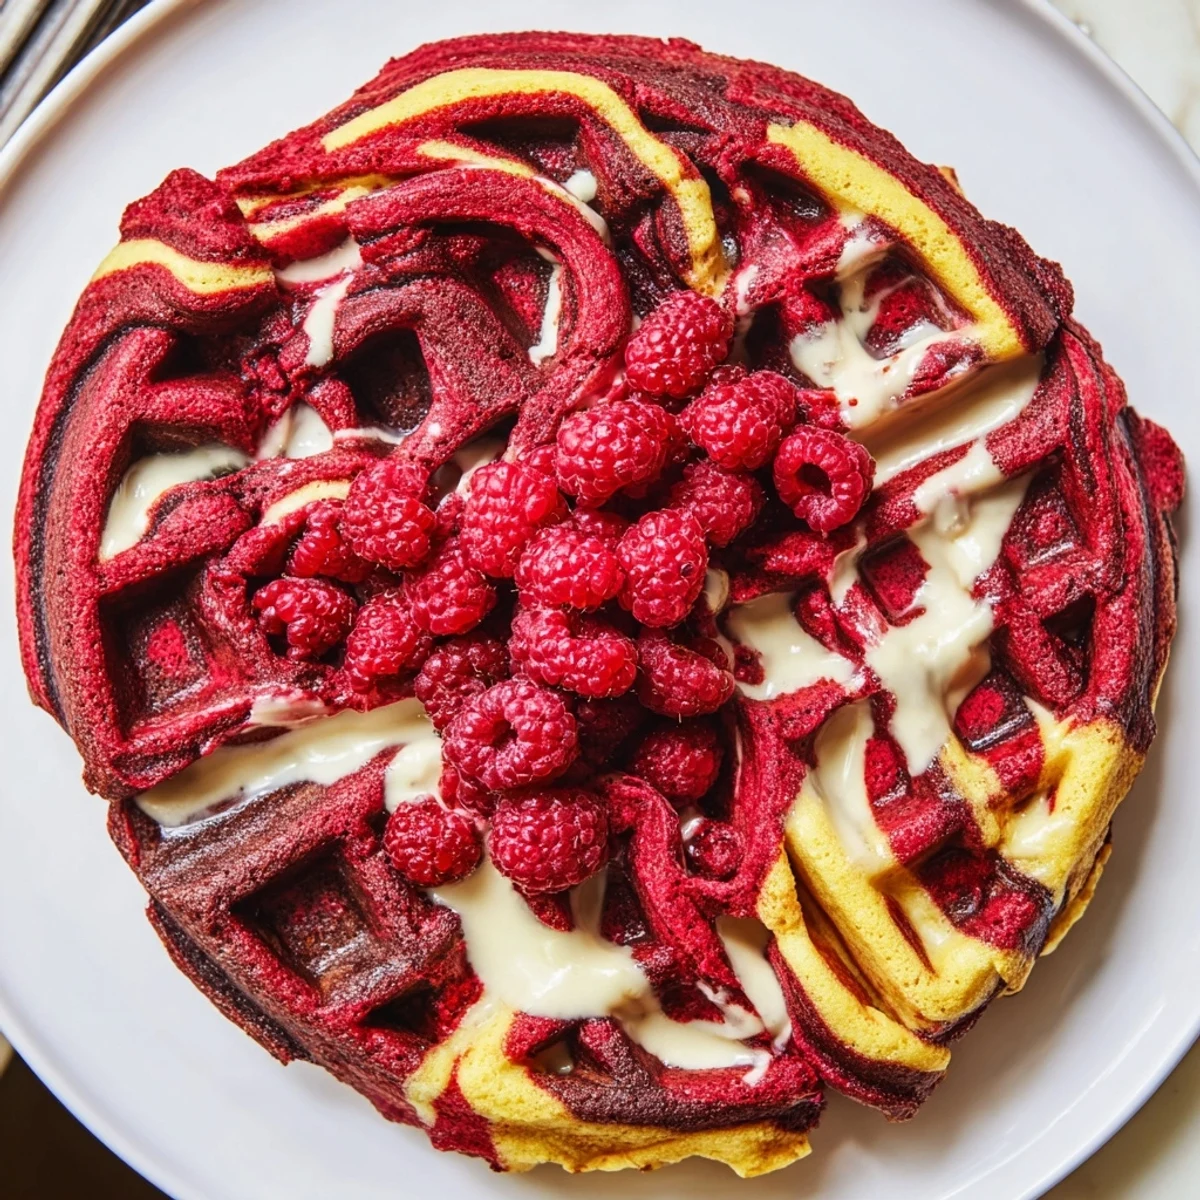
The batter comes together in just 15 minutes using pantry staples, with a simple technique of dividing the base and adding cocoa and red food coloring to half. You'll dollop alternating spoonfuls of each batter onto your waffle iron, then swirl gently to create that gorgeous marble effect. The result is perfectly crisp exterior with a tender, fluffy interior that balances rich chocolate notes with bright vanilla undertones.
These waffles are incredibly versatile—top them with a homemade cream cheese glaze, drizzle with warm maple syrup, or keep it simple with fresh berries and whipped cream. The buttermilk ensures tenderness while the combination of baking powder and soda guarantees the perfect rise every time.
The first time I made these was during a rainy Sunday morning when my youngest daughter insisted we needed something special for breakfast. She had just discovered red velvet cake and was convinced it should be acceptable breakfast food, and honestly, I was inclined to agree with her logic.
Last Valentine Day, I made a double batch for our neighborhood brunch, and watching the kids faces light up when they saw those beautiful red streaks was absolutely priceless. One neighbor actually asked if I had bought them from a fancy bakery.
Ingredients
- 2 cups all-purpose flour: The backbone of your waffle structure, providing the perfect canvas for those beautiful swirls
- 2 tbsp granulated sugar: Just enough sweetness to balance the tangy buttermilk without overpowering the subtle vanilla notes
- 2 tsp baking powder and 1/2 tsp baking soda: This dual leavening combo ensures your waffles rise tall and stay fluffy inside while getting crisp outside
- 1/4 tsp salt: Enhances all the flavors and helps balance the sweetness from any toppings you might add
- 1 3/4 cups buttermilk, room temperature: The secret ingredient for tender waffles with that characteristic tang red velvet is known for
- 2 large eggs: Room temperature eggs blend better and help create that perfect waffle texture
- 4 tbsp unsalted butter, melted and slightly cooled: Adds richness and helps achieve that crispy exterior we all love in a good waffle
- 1 tsp vanilla extract: Pure vanilla makes all the difference in the plain batter portion
- 2 tbsp unsweetened cocoa powder: Dutched cocoa gives the red portion its classic chocolate undertone without being too intense
- 1 tbsp red food coloring: Gel coloring produces a more vibrant red without adding extra liquid to your batter
Instructions
- Mix your dry ingredients:
- Whisk together flour, sugar, baking powder, baking soda, and salt in a large bowl until everything is evenly distributed and well combined
- Combine the wet ingredients:
- In a separate bowl, whisk buttermilk, eggs, melted butter, and vanilla extract until completely smooth and emulsified
- Make the base batter:
- Gently fold the wet mixture into the dry ingredients just until combined, being careful not to overmix as this can make tough waffles
- Create your two batters:
- Divide the batter evenly between two bowls, then add cocoa powder and red food coloring to one bowl and stir until well blended
- Preheat your waffle iron:
- Get your waffle iron nice and hot according to the manufacturers instructions, then lightly grease with oil or nonstick spray
- Swirl the magic:
- Drop alternating spoonfuls of red velvet and vanilla batters onto the center of the hot iron, then use a chopstick to gently swirl for that marble effect
- Cook to perfection:
- Close the lid and cook until golden and crisp, usually about 3 to 5 minutes depending on your waffle iron
- Serve immediately:
- These are best enjoyed straight from the iron while still warm and irresistibly crispy with your favorite toppings
 Save
Save My husband now requests these for his birthday breakfast every year, and I have started keeping red food coloring in the pantry just for this occasion. There is something about cutting into a waffle and seeing those beautiful swirls that makes any morning feel like a celebration.
Getting The Perfect Marble Effect
I have learned that less is more when swirling the batters together. Too much swirling blends the colors into a muddy brown, but just two or three gentle figure eights with your chopstick creates those stunning distinct streaks that make these waffles so special.
Making Ahead And Storing
While these are best fresh, you can actually freeze the cooked waffles and pop them in the toaster for quick weekday breakfasts. Just let them cool completely on a wire rack before freezing in a single layer, then stack them with parchment paper in between.
Topping Ideas Beyond The Basics
A simple cream cheese glaze made with cream cheese, milk, and powdered sugar takes these over the top. Sometimes I even add a tablespoon of maple syrup to the glaze for that extra depth of flavor that pairs so beautifully with the cocoa.
- Fresh strawberries add both color and a bright acidity that cuts through the richness
- Whipped cream flavored with a hint of vanilla makes these feel extra indulgent
- A drizzle of warm maple syrup helps tie the red velvet and vanilla flavors together
 Save
Save Whether for a special occasion or just because, these waffles turn an ordinary morning into something worth remembering. Happy cooking.
Recipe FAQs
- → What makes red velvet waffles different from regular waffles?
-
Red velvet waffles incorporate cocoa powder and red food coloring into the batter, creating that signature deep red color and subtle chocolate flavor that's characteristic of traditional red velvet cake. The marble version adds visual interest by swirling the red batter with plain vanilla batter for a stunning presentation.
- → Can I make these waffles without buttermilk?
-
Yes, you can substitute Greek yogurt thinned with a splash of milk, or create a homemade buttermilk alternative by adding 1 tablespoon of vinegar or lemon juice to 1 ¾ cups of milk and letting it sit for 5 minutes before using.
- → How do I achieve the perfect marble swirl?
-
The key is adding alternating spoonfuls of red velvet and vanilla batters to the waffle iron rather than mixing them together beforehand. Use a chopstick, butter knife, or toothpick to gently swirl the two batters just once or twice—over-swirling will blend the colors too much and lose the marble effect.
- → What toppings work best with red velvet waffles?
-
Cream cheese glaze is the classic pairing that mirrors traditional red velvet cake. Simply blend softened cream cheese with milk and powdered sugar until smooth. Other excellent options include whipped cream with fresh berries, warm maple syrup, or even a dusting of powdered sugar for elegance.
- → Can I freeze these waffles for later?
-
Absolutely! Let the waffles cool completely, then place them in a single layer on a baking sheet and freeze until firm. Transfer to a freezer-safe bag or container. Reheat in a toaster or oven at 350°F for 5-10 minutes until crispy and heated through.
- → Is liquid or gel food coloring better for this recipe?
-
Gel food coloring typically produces more vibrant red tones with less liquid, which can help maintain the perfect batter consistency. However, liquid food coloring works perfectly fine—you may just need to add slightly more to achieve your desired shade of red.