 Save
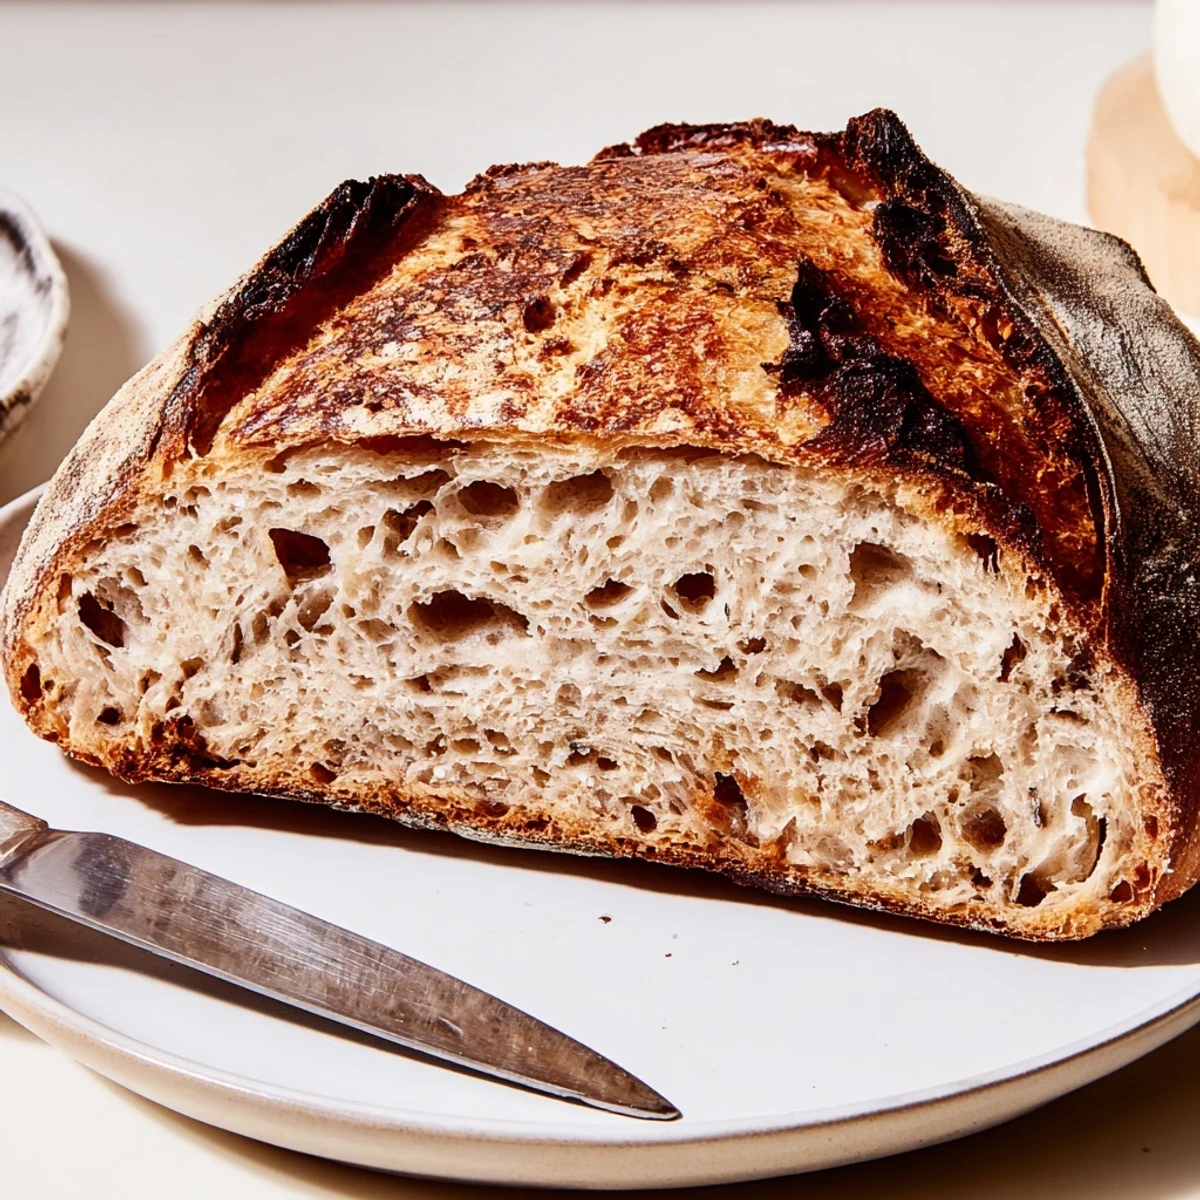
Save Craft an authentic sourdough loaf using wild yeast fermentation for that distinctive tangy flavor and artisanal texture. This traditional method combines bread flour, water, starter, and salt through a series of stretch and folds, followed by an overnight cold proof. The result is a beautiful crackling crust with an open, airy crumb structure perfect for toasting or serving alongside your favorite meals. While the extended fermentation time requires patience, the active hands-on work remains minimal, making this an rewarding weekend baking project that delivers professional-quality results.
My kitchen counter became a science lab the week I decided to tackle sourdough. There were sticky fingers, flour clouds, and a starter that I treated like a pet requiring daily attention and conversation. The first loaf emerged dense as a brick, but something about that crackling crust hooked me completely. Now the ritual of feeding my starter and timing bakes around my life feels like meditation disguised as bread making.
Last winter, during a snowstorm that trapped us inside for days, I baked three loaves back to back. The smell permeated every corner of our small apartment, drawing neighbors to our door like cartoon characters floating toward a pie cooling on a windowsill. We ate warm slices with melting butter standing right there in the kitchen, snow piling up against the glass. Something about breaking bread during a storm made everything feel right with the world.
Ingredients
- Bread flour: Higher protein content than all purpose gives better gluten development for that signature chewy crumb
- Water: Room temperature hydrates evenly, and measuring by weight ensures consistency batch after batch
- Active sourdough starter: This living culture does all the heavy lifting, so use it at its peak bubbly activity for best rise
- Fine sea salt: Controls fermentation speed while enhancing flavor, and the fine texture dissolves evenly throughout the dough
Instructions
- Mix and rest:
- Combine flour and water in a large bowl until no dry patches remain. Cover and let it sit for one hour to let the flour fully hydrate, which makes later mixing and folding much easier.
- Incorporate starter:
- Add your active starter and salt to the rested dough. Mix thoroughly by hand, squeezing the dough through your fingers until the starter is completely distributed and the dough feels cohesive.
- Build strength:
- Perform four sets of stretch and folds at thirty minute intervals, grabbing one edge of the dough and pulling it up and over the center. Rotate the bowl and repeat until all sides have been stretched, then cover between sets.
- Bulk fermentation:
- Let the dough rise at room temperature for four to six hours, until it has visibly increased in size and shows visible bubbles on the surface. The dough should feel jiggly and aerated when you gently shake the bowl.
- Shape your loaf:
- Turn the dough onto a lightly floured surface and gently fold the edges toward the center to create tension. Flip it over and rotate it against the counter to form a tight round or oval loaf.
- Cold proof:
- Transfer the shaped dough seam side up into a floured proofing basket or bowl lined with a floured towel. Cover and refrigerate for eight to twelve hours to develop flavor while the cold firms up the shape.
- Preheat properly:
- Place your Dutch oven in the oven and preheat to 230°C (450°F) for at least thirty minutes. Getting both the pot and oven thoroughly hot is crucial for that initial oven spring.
- Score and bake:
- Gently invert your dough onto parchment paper and use a sharp blade to make a confident slash across the top. Transfer with the parchment into your hot Dutch oven, cover, and bake for twenty minutes before removing the lid.
- Finish with color:
- Bake uncovered for another twenty minutes until the crust reaches a deep golden brown. Cool on a wire rack for at least one hour to let the internal crumb set properly.
 Save
Save My daughter now asks for sourdough toast every single morning, spreading butter so thick it leaves yellow fingerprints on everything. Watching her break off pieces while standing on her step stool reminds me that the best recipes become part of your familys daily rhythm. Bread has a way of marking time and memory unlike anything else in the kitchen.
Understanding Your Starter
A healthy starter should double in size within four to six hours of feeding at room temperature. The surface should look bubbly and slightly domed, almost like it is breathing. If your starter is sluggish or separates with liquid on top, try feeding it more frequently for a few days before attempting a loaf.
Getting the Crust You Want
The Dutch oven creates steam during the first half of baking, which allows the bread to expand fully before the crust sets. For an extra crisp finish, you can remove the loaf from the Dutch oven for the last five minutes and place it directly on the oven rack. The increased air circulation will deepen that golden crunch even further.
Timing Your Bake
The beauty of cold fermentation is that you can bake according to your schedule rather than the doughs demands. Mix your dough in the evening, shape before bed, and bake fresh bread the next morning whenever it works for you. Just make sure the Dutch oven has plenty of time to get properly hot before you score.
- Rice flour creates a nonstick surface better than wheat flour for your proofing basket
- Resist the urge to slice into your loaf before it cools completely
- Store bread cut side down on a cutting board to keep the crumb fresh for days
 Save
Save There is nothing quite like the sound of a fresh loaf crackling as it cools on the wire rack. That song means you did something right.
Recipe FAQs
- → What makes sourdough different from regular bread?
-
Sourdough uses wild yeast and beneficial bacteria naturally present in flour rather than commercial yeast. This creates lactic acid, giving the loaf its characteristic tangy flavor while improving digestibility and extending freshness naturally.
- → How do I know when my starter is active enough to use?
-
An active starter will double in size 4-8 hours after feeding, display numerous bubbles throughout, have a pleasant slightly sour aroma, and pass the float test when a small spoonful floats in room temperature water.
- → Can I reduce the fermentation time?
-
While tempting to speed up the process, the extended fermentation is essential for developing flavor, texture, and digestibility. Shorter fermentation results in less complex flavor and denser crumb structure.
- → Why is cold fermentation recommended?
-
Refrigerating the shaped dough overnight slows yeast activity while allowing enzymes to continue breaking down starches and proteins. This develops deeper flavor, improves texture, and makes scheduling more convenient.
- → What if I don't have a Dutch oven?
-
A Dutch oven creates steam essential for crust development. Alternatives include placing a metal tray of ice cubes in the oven bottom, covering with a large stainless steel bowl, or baking on a preheated stone with inverted roasting pan.
- → How should I store the finished loaf?
-
Store cut side down on a wooden board at room temperature for 2-3 days. For longer storage, wrap tightly and freeze up to 3 months. Avoid refrigeration as it accelerates staling.