 Save
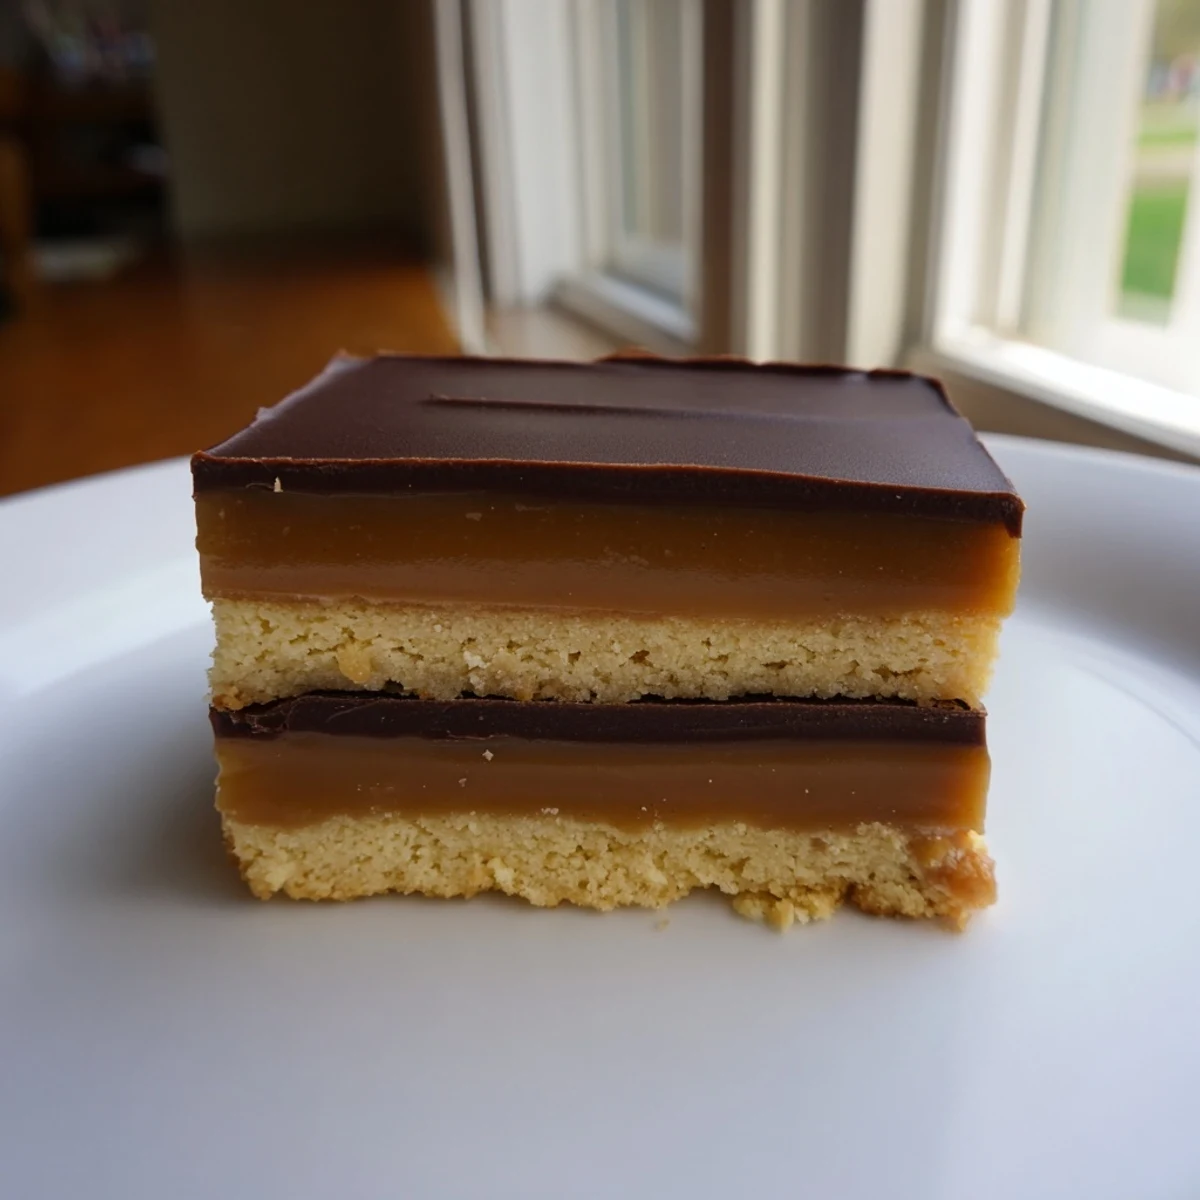
Save These wholesome bars capture everything you love about the classic candy while using whole food ingredients. The almond-coconut crust provides a crunchy, nutty foundation that's naturally gluten-free and packed with healthy fats. A silky date caramel layer offers natural sweetness with additional fiber and nutrients, while the dark chocolate topping delivers antioxidants and rich flavor.
The entire process requires no baking—just freezing time to set each layer. With only 25 minutes of hands-on preparation, you can create 12 impressive bars that store beautifully in the refrigerator for up to two weeks. Perfect for meal prep, gatherings, or whenever a sweet craving strikes.
The first time I made these, my husband took one bite and genuinely asked what I did differently. He couldn believe these were the same candy bars we used to buy at the gas station. The crust somehow manages to be buttery without any butter, and that date caramel gets this incredible fudge-like consistency that makes you forget all about processed sugar.
My sister came over last month when I had a batch chilling. She ate two bars standing at the counter, then immediately texted her friend the recipe. Something about seeing real food ingredients transform into something so indulgent feels like magic. Now she makes them for her kids lunchboxes instead of store-bought treats.
Ingredients
- Almond flour: Creates that sandy shortbread texture that holds everything together beautifully
- Coconut flour: Absorbs moisture and gives the crust structure without being dense
- Melted coconut oil: Binds the crust and adds that subtle richness we all crave
- Maple syrup: Just enough natural sweetness to make the crust taste like a treat
- Pinch of salt: Never skip this, it makes all the flavors pop
- Medjool dates: These are the secret to caramel that tastes incredibly authentic
- Almond butter: Adds depth and creaminess to the date mixture
- Coconut milk: Makes the caramel blend silky smooth
- Vanilla extract: Rounds out all the flavors and makes everything taste bakery-made
- Dark chocolate chips: The finishing touch that makes these feel completely indulgent
Instructions
- Prepare your pan:
- Line that loaf pan with parchment paper, letting the edges hang over for easy lifting later
- Make the crust:
- Mix everything in a bowl until it comes together like dough, then press it firmly into your pan and freeze for 15 minutes
- Blend the caramel:
- Throw dates, almond butter, coconut milk, vanilla and salt into your food processor and blend until completely smooth
- Layer it on:
- Spread that gorgeous caramel over your chilled crust, making it as even as possible, then freeze another 30 minutes
- Add the chocolate:
- Melt chocolate chips with coconut oil until glossy and pour over the firm caramel layer
- Final chill and slice:
- Freeze at least 30 more minutes until set, then lift out and cut into bars
 Save
Save Last Christmas I made three batches because they disappeared so fast at family gatherings. My aunt who never eats dessert took one bite and asked for the recipe immediately. These bars have this way of making people feel cared for, like you put in way more effort than you actually did.
Making Them Your Own
I started adding a pinch of sea salt on top of the chocolate layer and it became a non-negotiable step. Something about that salty-sweet finish makes them taste gourmet. My kids prefer them plain, but guests always comment on the salt variation.
Storage Secrets
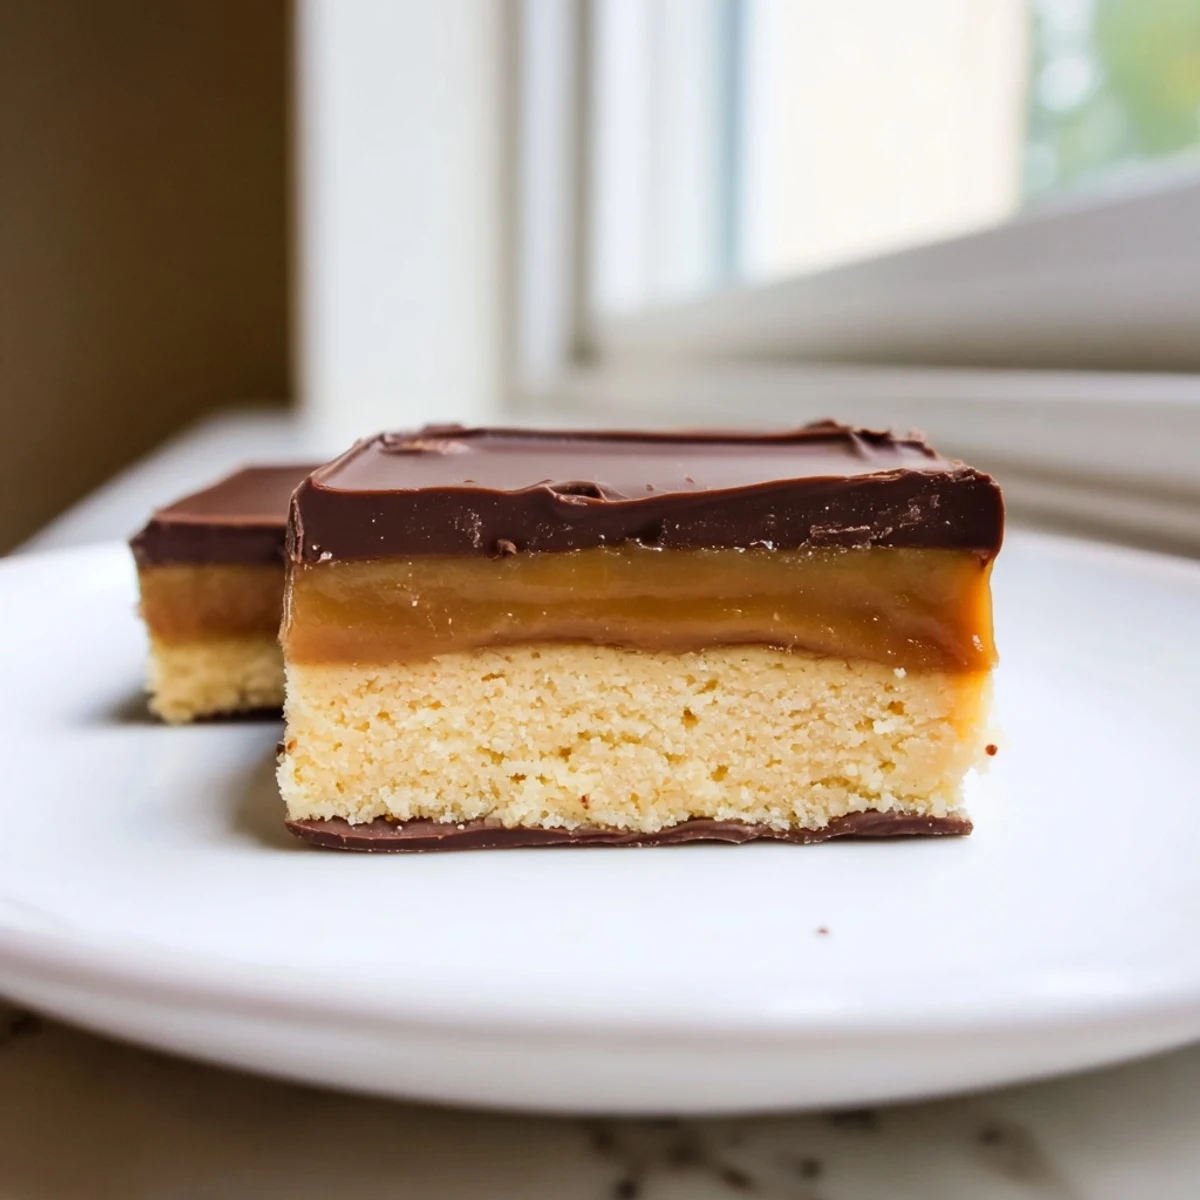
These actually get better after a day or two in the fridge as the flavors meld together. I keep mine in the freezer and eat them straight from frozen. The texture becomes perfectly chewy and they never get too hard like some frozen treats do.
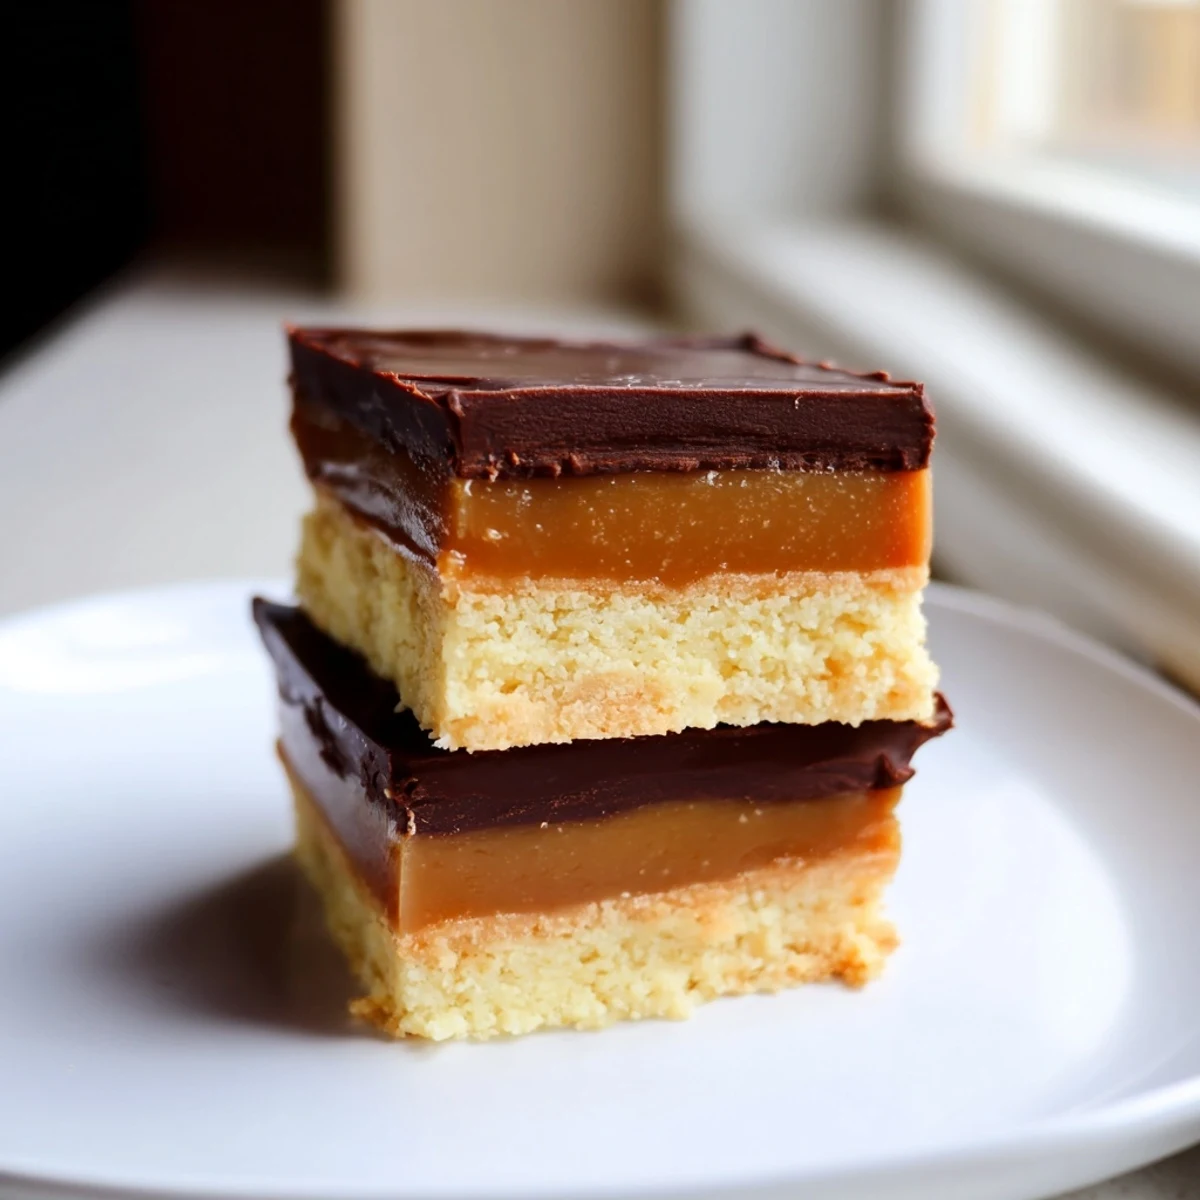
Serving Ideas
Serve them slightly chilled for the best texture experience. I love arranging them on a pretty plate for guests, they look so elegant with the distinct layers. The contrast between the crunchy crust, creamy caramel, and snappy chocolate is what keeps everyone coming back.
- Sprinkle some flaky sea salt on the chocolate before it sets
- Try different nut butters in the caramel for variety
- Cut them smaller if serving as part of a dessert spread
 Save
Save Every time I make these I'm surprised by how satisfying they are, that perfect balance of indulgent and wholesome. They've become my go-to for bringing to gatherings because they work for practically everyone.
Recipe FAQs
- → How long do these bars need to freeze?
-
Plan for approximately 1 hour and 15 minutes total freezing time: 15 minutes for the crust, 30 minutes after adding the caramel layer, and at least 30 minutes once the chocolate coating is applied. For easiest cutting, freeze until completely firm.
- → Can I make these nut-free?
-
Yes, simply substitute oat flour for both almond and coconut flour, and use sunflower seed butter instead of almond butter. The texture will remain similar, though slightly less rich than the nut-based version.
- → What's the best way to store these bars?
-
Keep refrigerated in an airtight container for up to 2 weeks. The bars can also be frozen for up to 3 months—layer them between parchment paper to prevent sticking. Let thaw 5-10 minutes before serving for optimal texture.
- → Do I need a food processor?
-
A high-speed blender works equally well for achieving smooth date caramel. If lacking both, try soaking dates in hot water for 30 minutes first, then mash thoroughly with a fork—though the texture will be slightly chunkier.
- → Can I use regular milk instead of coconut milk?
-
Any creamy plant milk will work, though coconut milk's higher fat content helps achieve the signature silky texture. For best results with other milks, reduce the amount slightly and add an extra tablespoon of almond butter.
- → Why is my caramel not smooth?
-
This usually means the dates weren't soft enough. Choose plump Medjool dates and soak them in warm water for 15-20 minutes before blending. Adding an extra teaspoon of coconut milk can also help achieve the desired consistency.