 Save
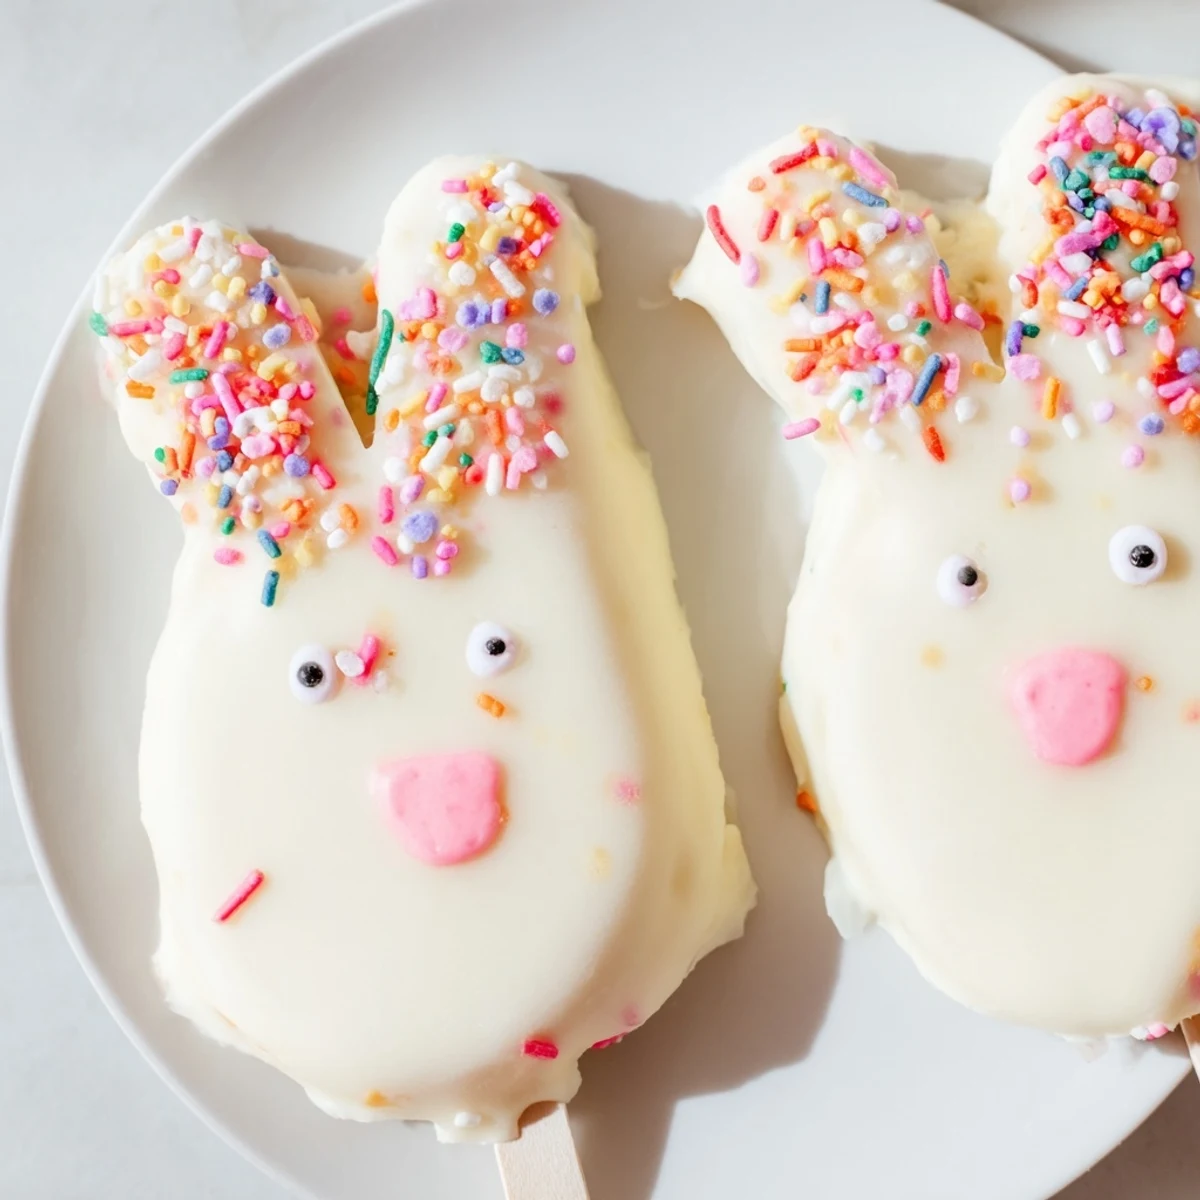
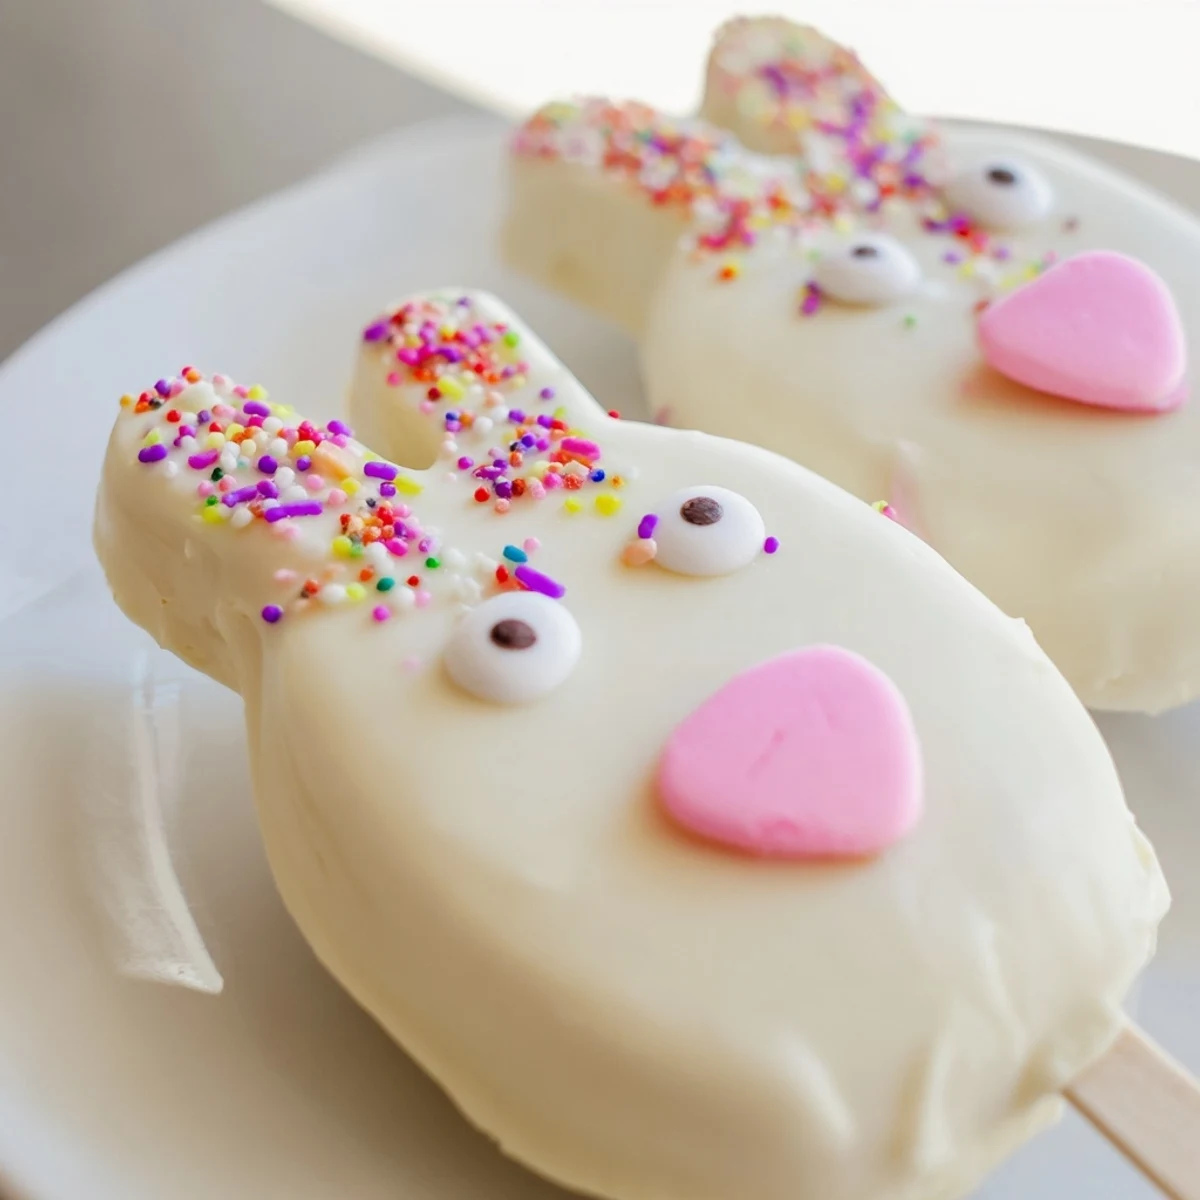
Save These delightful bunny-shaped treats combine moist vanilla cake with a rich white chocolate coating, creating festive Easter desserts that both kids and adults will adore. The cake mixture blends vanilla crumbs with cream cheese, butter, and powdered sugar for perfect texture, while the white chocolate coating provides a smooth, sweet finish. Each cakesicle takes about an hour from start to finish, yielding eight adorable bunny faces perfect for spring gatherings.
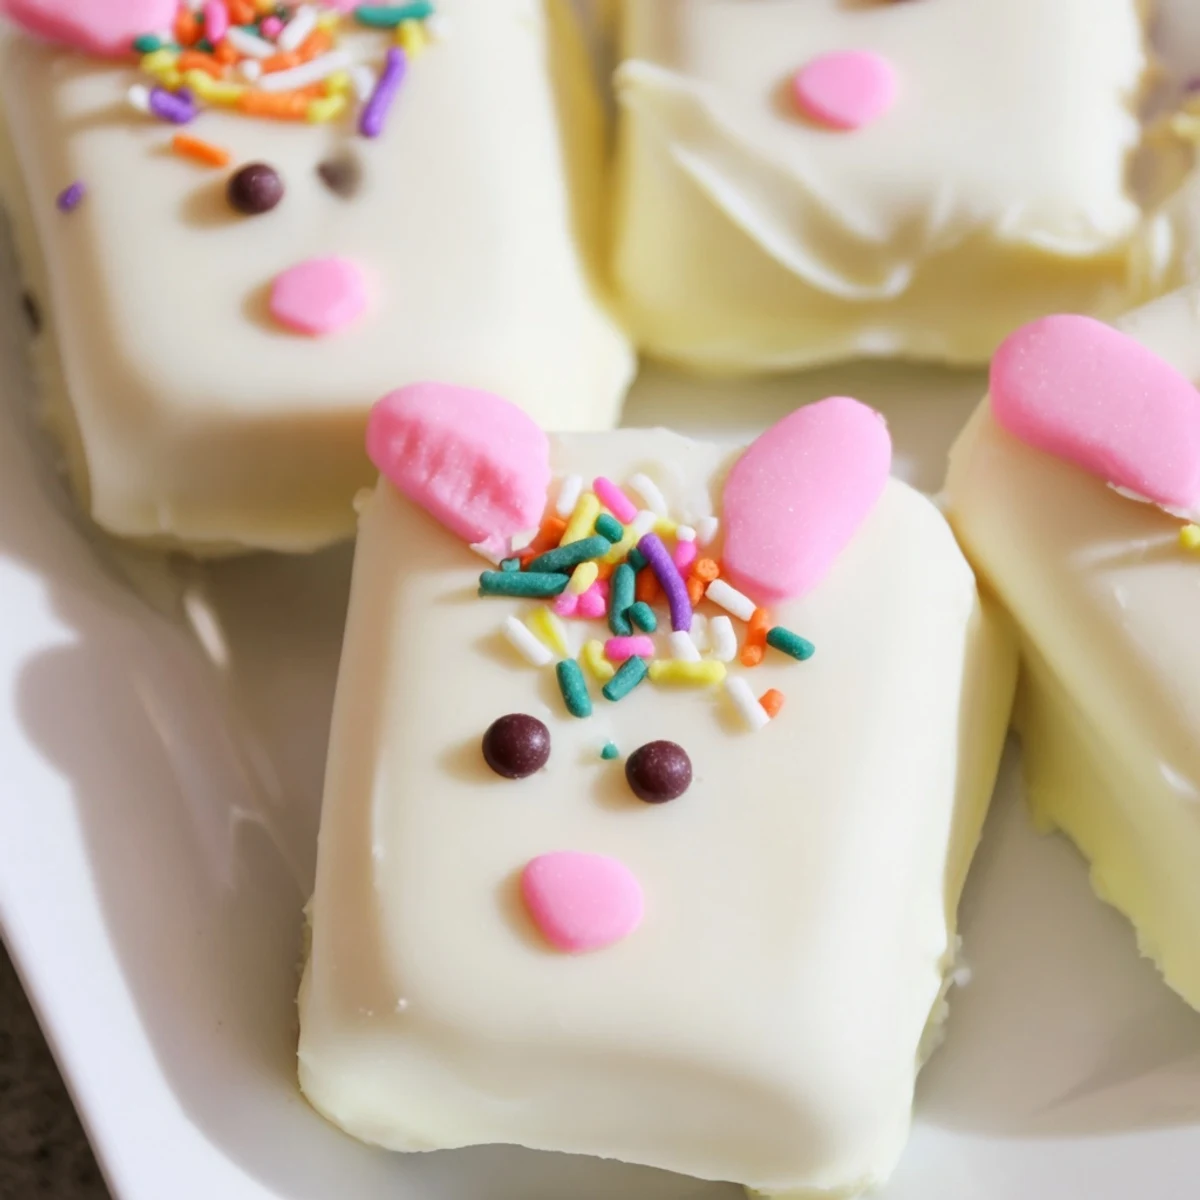
Customize your bunnies with edible gel coloring, candy eyes, sprinkles, or fondant ears and noses. The treats hold up well for up to three days when refrigerated, making them excellent for advance preparation. Try experimenting with different cake flavors like chocolate or lemon, or swirl pink coloring into the white chocolate for a marbled effect that adds visual interest to your Easter dessert spread.
The kitchen counter was covered in white chocolate splatters when my six-year-old niece looked up with frosting on her nose and declared these the best things ever. We were supposed to be making simple cake pops for her class, but somewhere between melting the chocolate and digging through the sprinkles drawer, bunny faces happened. Now they're the one thing she asks for every single spring, and I honestly don't mind the excuse to break out the pastel sprinkles myself.
Last year I made these for my daughter's Easter party and watched three different moms ask for the recipe while simultaneously wiping chocolate off their children's faces. There's something about food on a stick that makes people happy, and when that food happens to be an adorable bunny, the joy multiplier goes up significantly. I've since learned to double the batch because they disappear faster than you'd expect anything this sweet to disappear.
Ingredients
- Vanilla cake crumbs: Using stale cake or leftover cupcakes works perfectly here, and honestly tastes better than fresh
- Cream cheese: This is what binds everything together into that perfect truffle-like texture
- Unsalted butter: Room temperature is non-negotiable, or you'll get lumps in your cake mixture
- Powdered sugar: Adds just enough sweetness to balance the tangy cream cheese
- Vanilla extract: Pure vanilla makes everything taste homemade and special
- White chocolate: High-quality melts make a huge difference in both flavor and how smoothly they coat
- Edible gel food coloring: Liquid coloring will seize your chocolate, so stick to gel or powder
- Cakesicle sticks: Paper straws work in a pinch, but proper sticks hold up better
Instructions
- Mix the cake dough:
- Combine everything in a bowl and get your hands in there, mixing until it holds together like soft cookie dough
- Shape your bunnies:
- Form 8 flattened oval shapes, gently pressing them so they're not too thick or the chocolate will crack
- Add the sticks:
- Insert sticks about halfway into each cake shape, then chill for 20-30 minutes until firm to the touch
- Melt the chocolate:
- Heat white chocolate in 30-second bursts, stirring between each until completely smooth and glossy
- Dip and tap:
- Dip each cake straight down into chocolate, lift while gently tapping to remove excess, then immediately add decorations before it sets
- Set and serve:
- Let them harden at room temperature for about 15 minutes, or pop them in the fridge for faster results
 Save
Save My favorite moment was when I brought these to a neighborhood gathering and watched the grown-ups get just as excited about them as the kids. There's something universally appealing about food that's meant to be playful, and these bunny cakesicles hit that perfect sweet spot between nostalgic and impressive.
Making Them Ahead
I've learned through trial and error that these actually taste better after sitting overnight in the fridge. The flavors meld together and the texture becomes fudgier, so don't hesitate to make them a day before your Easter celebration.
Decoration Ideas
Beyond the classic candy eyes and pink noses, try using edible glitter for sparkly ears or crushed freeze-dried strawberries for a natural pink coloring. Sometimes the best decorations come from whatever you have in your baking cabinet.
Troubleshooting Tips
If your chocolate keeps cracking, it's almost always because your cake centers are too cold or your chocolate is too cool. Work at room temperature and be patient with the melting process.
- Let the melted chocolate cool slightly before dipping, it adheres better when it's not piping hot
- Keep some extra melted chocolate handy for touch-ups and修补 any spots you miss
- Have all decorations ready before you start dipping, the chocolate sets fast
 Save
Save There's pure magic in watching someone bite into a cakesicle for the first time, that moment of surprise when they realize it's cake on a stick. Happy Easter, and may your chocolate never seize.
Recipe FAQs
- → What makes cakesicles different from regular cake pops?
-
Cakesicles feature a flattened, paddle-like shape that sits flat on surfaces and offers more surface area for decorating. Their oval form makes them perfect for creating detailed designs like bunny faces, and their larger size provides a more satisfying ratio of chocolate coating to cake filling compared to traditional spherical cake pops.
- → Can I make these without a cakesicle mold?
-
Absolutely! Simply shape the cake mixture into flattened ovals by hand, insert the sticks, and chill until firm before dipping. The mold creates uniform shapes but isn't essential for achieving beautiful bunny faces. Hand-shaping allows for unique, artisanal variations in each bunny's expression.
- → What other cake flavors work well with white chocolate coating?
-
Lemon cake creates a refreshing contrast, while chocolate cake offers a classic combination. Red velvet adds dramatic color, and Funfetti brings playful sprinkles throughout. Carrot cake suits Easter themes perfectly, complementing both the white coating and spring festivities. The key is using firm, fine crumbs that bind well with the cream cheese mixture.
- → How far in advance can I prepare these for Easter?
-
Complete the entire process up to three days before your celebration. Store finished cakesicles in an airtight container in the refrigerator, layered between parchment paper. The white chocolate coating may develop slight condensation when chilled, but this disappears once they reach room temperature. For optimal freshness and decoration integrity, prepare them 24-48 hours ahead rather than the full three days.